


What is the Special Test Procedure for Hand-Held Power Tools in Construction?
Construction sites present some of the most challenging operating environments for electrical equipment. Unlike equipment in dry, temperature-controlled office environments, hand-held power tools on building sites are continuously exposed to severe mechanical shock, abrasive dust, water, moisture, and extreme temperature fluctuations. Because of these demanding conditions, basic domestic or commercial electrical checks fall short of ensuring safe operation on site.
1. Understanding Equipment Classifications and Site Supply Requirements
Before applying any electrical testing procedure, inspectors must determine the tool's insulation class and operating voltage. On UK and European construction sites, standard 230V mains power is heavily restricted due to shock hazards. Instead, site tools typically operate on a Reduced Low Voltage (RLV) system—specifically 110V Single Phase derived from a Center-Tapped Earth (CTE) transformer. In this system, the maximum voltage relative to ground is capped at just 55V, drastically reducing shock severity.
Hand-held power tools generally fall into two construction classes:
-
Class I Equipment: These tools rely on basic electrical insulation and an exposed metal casing connected to a protective earth conductor. If internal insulation fails, the current safely flows to ground, tripping protective devices.
-
Class II Equipment (Double Insulated): Identified by the double square symbol, Class II tools feature two independent layers of insulation surrounding live parts. They do not require a protective earth conductor and are usually enclosed in tough plastic or composite housings.
Because hand-held tools are constantly manipulated during work, cables and internal connections experience continuous mechanical stress, making accurate classification crucial prior to testing.
2. Step 1: The Enhanced Visual and Physical Inspection
Statistically, over 95% of electrical faults on construction power tools are identified during a rigorous visual and physical inspection before test instruments are even switched on. Due to the aggressive nature of construction work, the visual inspection phase must be far more exhaustive than standard office checks.
An effective visual inspection procedure for hand-held power tools includes checking the following key areas:
-
Cable and Flex Condition: Inspect the entire lead length for cuts, abrasions, thermal damage, exposed inner cores, or improper tape joins.
-
Plug Top and Strain Relief: Ensure 110V yellow (or 230V blue) BS EN 60309 industrial plugs are undamaged, properly secured, and fitted with functional cord grips that prevent strain on internal terminals.
-
Tool Housing Integrity: Inspect composite casings for cracks, deep gouges, missing screws, or loose panels that could compromise electrical insulation or allow dust and water ingress.
-
Trigger and Safety Switch Operation: Check that power switches operate smoothly, latch correctly, and release instantly when pressure is removed.
-
Guards and Mechanical Fixtures: Ensure all protective guards, auxiliary handles, and mechanical safety mechanisms are structurally sound and firmly attached.
If any tool fails this initial physical examination, it must immediately be tagged out of service and routed for repair.
3. Step 2: Electrical Test Protocols for Construction Tools
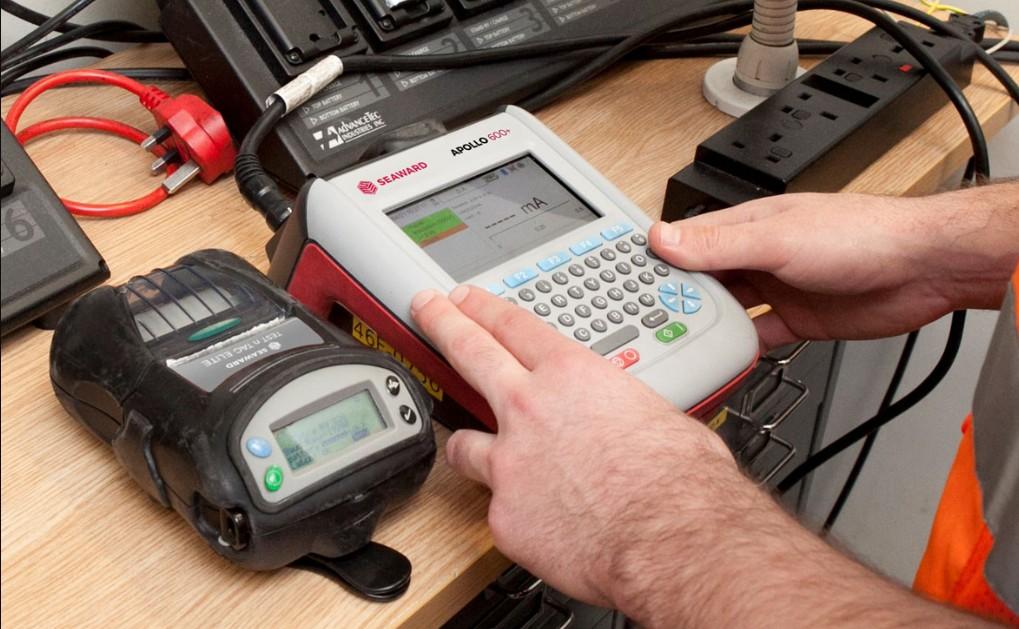
Once a tool successfully passes physical evaluation, specialized electrical test routines are applied using calibrated testing equipment. Because hand-held tools undergo continuous movement during operation, testing must verify that internal insulation and grounding paths remain completely stable under flex and load.
For those responsible for maintaining site safety standards, enrolling in a comprehensive pat testing course provides the crucial theoretical knowledge and practical training needed to carry out these specialized tests safely and accurately.
The standard electrical testing routine consists of:
Earth Continuity / Earth Bond Test (Class I Tools Only)
A test current (typically 200mA for delicate electronics or up to 10A/25A for rugged tools) is passed between the earth pin of the plug and exposed metal parts of the tool. The measured resistance must not exceed 0.1 +R, where R is the resistance of the supply cable. During this test, the cable should be gently flexed near strain relief points to detect intermittent wire breaks.
Insulation Resistance Test
A test voltage of 500V DC is applied between live conductors and exposed metal (or conductive foil wrapped around Class II plastic bodies). The minimum acceptable insulation resistance for Class I and Class II portable site tools is normally 1.0 M. However, for tools containing sensitive electronics, a lower 250V DC test may be used to avoid component damage.
Touch and Leakage Current Test
If insulation resistance testing yields ambiguous results or if the tool features electronic control circuits, a protective conductor current or substitute leakage test is performed at actual operating voltage to verify that unwanted current leakage remains within safe limits (typically under 0.75mA to 3.5mA depending on equipment class).
4. Testing Frequency and Record-Keeping Standards
Due to the intense wear and tear present on construction environments, test frequencies are significantly higher than in standard workplace settings. According to guidance from the Health and Safety Executive (HSE) and the IET Code of Practice, site power tools require structured, recurring inspections:
-
User Pre-Use Check: Performed daily or before every shift by the operator.
-
Formal Visual Inspection: Executed monthly or every 3 months by a competent person.
-
Combined Inspection and Electrical Test: Conducted every 3 months (110V site equipment) or monthly for 230V tools used on site premises.
Every tested tool must be fitted with a clear, weather-resistant pass tag indicating the date of inspection, the test engineer's initials, and the next scheduled re-test date. Furthermore, all quantitative readings must be logged in an asset management register to track safety trends over time.
5. On-Site Storage and Maintenance Best Practices
Conducting regular test routines is only part of the safety equation. Maintaining tool integrity between inspection cycles requires disciplined site practices.
To prolong tool lifespan and lower failure rates:
-
Store power tools in clean, dry tool chests or dedicated site stores when not in use.
-
Avoid lifting or dragging power tools by their flexible cables or supply cords.
-
Use designated cable reels and extension leads rated correctly for the tool's amperage.
-
Ensure residual current devices (RCDs) are tested daily using their built-in test button prior to operating any 230V equipment.
Conclusion: Securing Compliance and Site Safety
The special test procedure for hand-held power tools in construction goes far beyond routine compliance—it is a critical safeguard against life-threatening electrical hazards. By combining rigorous physical checks, precise electrical testing, proper equipment classification, and strict 3-month re-test intervals, site operators can maintain high productivity while ensuring the safety of every worker on site.

 English
 Arabic
 French
 Spanish
 Portuguese
 Deutsch
 Turkish
 Italiano
 Russian
 Romaian
 Portuguese (Brazil)
 Greek
Greek